
How To Create A SQL Database In Azure – Lab6
In this tutorial you will learn how to create a SQL Database in Azure. This lab will walk you through the steps to deploy SQL server and to create a SQL database.
Task Details
- Log into Azure Portal.
- Create Azure SQL Database.
- Create a SQL Server firewall rule.
- Connect to the Azure SQL Database.
Task 1: Log into Azure Portal
- Open a browser tab and go to the Azure portal using URL https://portal.azure.com.
- Sign in with your username and password on azure portal.

Task 2: Create Azure SQL Database
1. From the Azure portal click Create a resource or click SQL Databases.

2. From the SQL databases Page click +Create.
3. Fill out the Basic tab with the following information.
Project Details:
- Subscription: Use the Default
- Resource Group: Create New or from the drop down select existing AzureLab.

Database Details:
- Database Name: AzureLabSQL01
- Server: Create new

- Server Name: azurelabsql01
- Location: (US) East US or your best location
- Authentication method: Use SQL Authentication
- Server admin login: SQLAdmin
- Password: Type one in.
- Afterwards click the OK button.
- Want to use SQL elastic pool? : No
- Compute + Storage: Click Configure Database

- Service Tier: General Purpose (Scalable compute and storage options)
- Compute Tier: Serverless
- For the rest on this page leave as default and click on the Apply button.
Backup storage redundancy
- Backup storage redundancy: locally-redundant backup storage.

4. Click Review + Create
5. Click the Create button.
Task 3: Create a SQL Server firewall rule
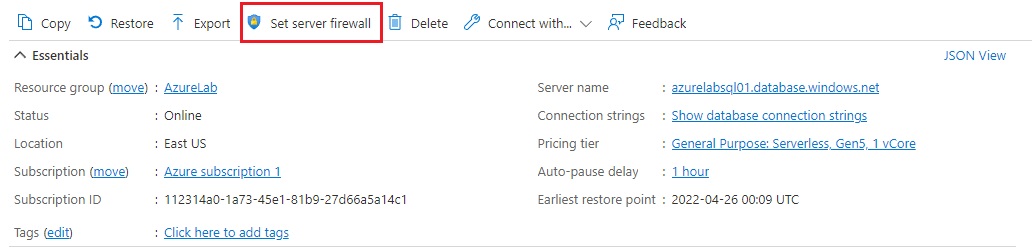
1. Once the deployment completes, select SQL databases from the Azure portal menu or search for and select SQL databases from the page.
2. Select AzureLabSQL01 on the SQL databases page. The overview page for your database will open and will provide you with the fully qualified server name (such as azurelabsql01.database.windows.net). This page also provides options for further configuration.
3. Click Set server firewall on the top toolbar.
4. Click +Add client IP on the toolbar. This will add a Rule for Server IP for port 1433 to pass through.
5. Click the Save button.

6. Go back to your SQL Database dashboard.
Task 2: Connect to the Azure SQL Database
1. From the left side panel locate and click on Query Editor (preview).

2. Type in your login username, your password and afterwards click the OK button.

3. You did it! You have successfully completely this lab once you have connected to your Azure SQL Database.

You have successfully completed this lab. Don’t forget to go through and delete all you have created when you are done.
I hope this article was helpful, if you have any questions, please feel free to contact me. If you would like to be notified of when I create a new post, you can subscribe to my blog alert.
Discover more from Patrick Domingues
Subscribe to get the latest posts sent to your email.